Analog Input Calibration
The True Temp RGA is equipped with an analog input card that is calibrated at the factory before the True Temp unit is shipped. Optionally, you can verify the calibration or re-calibrate the unit at a later time if desired. The Analog Input Calibration includes Zero and Span calibrations for millivolt input and calibration of the actual thermocouple inputs based on the type of thermocouple wire used (the RGA supports calibration with type “K” and type “S” wire). This section provides more information on performing those calibrations, if you wish to perform them. Note the warning below.
|
IMPORTANT!
SSi strongly recommends that anyone who performs these calibrations have previous experience with and strong working knowledge of this type of procedure. If in doubt, contact SSi at 513-772-0060 to request assistance or to have the unit returned to the factory for calibration. An improperly performed calibration will significantly impact temperature readings in a negative way.
|
To perform a millivolt calibration (Zero and Span):
Needed: Copper wire (not thermocouple wire), millivolt sourcing device
-
Open the Analog Input Calibration page.
-
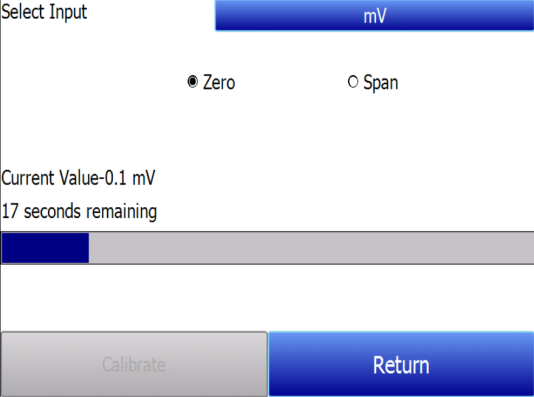
Make sure that the selected input at the top of the screen is mV.
-
Prepare the millivolt sourcing device. This device should be capable of sourcing a specified raw voltage between 0 and 1 volt.
-
Connect the copper wire from the millivolt device to the white input jack labeled “CU” (uncompensated) on the side of the case.
-
Tap Zero on the touch screen.
-
Configure the millivolt sourcing device to deliver zero millivolts.
-
Wait for the “Current Value” displayed on the screen to get as close to zero as possible.
-
Tap Calibrate. Tap “Yes” when asked if you want to proceed with the calibration. A progress indicator will appear.

-
When the process completes, Zero calibration is finished.
-
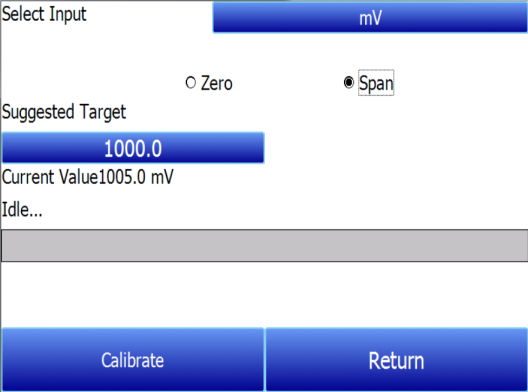
Tap Span on the touch screen.
-
Configure the millivolt sourcing device to deliver the desired voltage at the high end of the desired span.
-
Wait for the “Current Value” displayed on the screen to get as close as possible to the voltage being delivered by the millivolt sourcing device.
-
Tap Calibrate. Tap “Yes” when asked if you want to proceed with the calibration. A progress indicator will appear.

-
When the process completes, Span calibration is finished.
To perform a temperature calibration (“Cold Junction Trim”):
Needed: Thermocouple wire type “S” and/or “K”, temperature sourcing device
-
Open the Analog Input Calibration page.
-
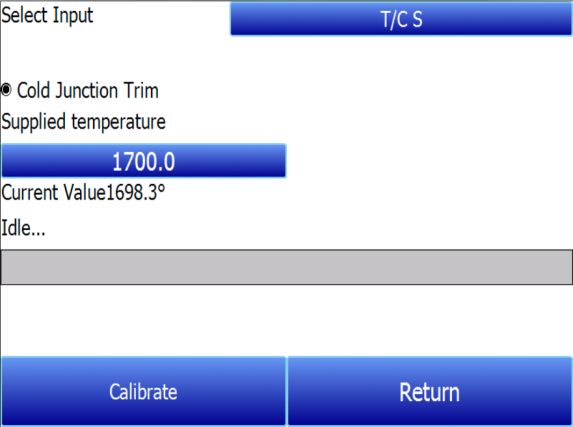
Make sure that the selected input at the top of the screen is T/C K or T/C S, depending on which thermocouple wire type you are using.

-
Prepare the temperature sourcing device. This device should be capable of sourcing a temperature from type “S” and type “K” thermocouple types.
-
Connect the thermocouple wire from the temperature sourcing device to the appropriate input on the side of the case.
-
Enter the desired temperature value based on which to deliver a corresponding voltage.
-
Configure the temperature sourcing device to deliver the proper voltage.
-
Wait for the “Current Value” displayed on the screen to get as close to the target voltage as possible.
-
Tap Calibrate. Tap “Yes” when asked if you want to proceed with the calibration. A progress indicator will appear.
-
When the process completes, temperature calibration is finished.